

Introduction –
Here we are going to discuss “How to implement image zoom functionality in react native“, in any mobile app this is a very basic functionality related to image.
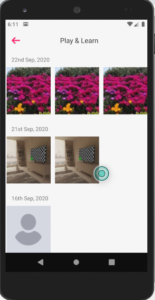
Before click on image output example –
After click on image output example –

How to implement –
In above we show you 2 different images one is a listing of images and another is a after click on image you see the next image where you can able to zoom the image, which is a very common functionality of image.
For integrating image zoom we are going to use the third party npm package, so follow all the steps carefully.
Step 1 – Installing plugin
here we are going to install the npm plugin which is a – react-native-image-zoom-viewer
npm install react-native-image-zoom-viewer Step 2 – Import the plugin
here you need to import the plugin in which file you need to integrate this plugin.
import ImageViewer from 'react-native-image-zoom-viewer';Step 3 – On image click
We need to apply the click operation on that image and redirect it to separate page which is photosZoom page.
export default class PhotosList extends Component {
  constructor(props) {
    super(props);
    setI18nConfig(); // set initial config
    this.state = {
      photosList: [],
      imagesList: [],
    };
  }

//you need to integrate this
 imageZoomFunctionality(image) {
    this.setState({imagesList: []});
    this.state.imagesList.push({url: image, height: 300, width: 350});
    Actions.PhotosZoom({photos: this.state.imagesList});
  }

photosItem(item, index) {
    return (
      <View
        style={{
          width: Device.width / 3.1,
          height: moderateScale(130),
       }}>
        <TouchableOpacity
          onPress={() => {
            this.imageZoomFunctionality(item.image);
          }}
          style={{
            width: '100%',
            backgroundColor: Colors.white,
          }}>
          <Image
            source={{uri: item.image}}
            resizeMode="stretch"
            style={{height: '100%', width: '100%'}}
          />
        </TouchableOpacity>
      </View>
    );
  }

 render() {
    const {photosList} = this.state;
    return (
      <SectionGrideView
         style={{backgroundColor: Colors.white}}
         showsVerticalScrollIndicator={false}
         data={item}
         numColumns={3}
         headerItem={item => this.photoHeaderItem(item)}
         renderItem={(item, index) => this.photosItem(item)}
        />
   )
 }
}
Step 4 – Image zoom code
In this page we integrate the zoom functionality.
import React, {Component} from 'react';
import {View, Text, StyleSheet} from 'react-native';
import {Colors} from '../themes';
import ImageViewer from 'react-native-image-zoom-viewer';

const TAG = 'PhotosZoom';
export default class PhotosZoom extends Component {
  constructor(props) {
    super(props);
    setI18nConfig(); // set initial config
    this.state = {
      photosList: this.props.photos || [],
      visible: false,
    };
  }

render() {
    return (
        <View style={styles.container}>
          <ImageViewer
            imageUrls={this.props.photos}
            renderHeader={() => (
              <Text
                style={{borderWidth: 5, borderColor: 'white'}}>
                {this.props.photos.length}
              </Text>
            )}
            enableImageZoom={true}
          />
        </View>
    );
  }
}

const styles = StyleSheet.create({
  container: {
    flex: 1,
    backgroundColor: Colors.white,
  },
});
Step 5 – Start the npm server
npm serveStep 6 – Run the code
react-native run-android
           or
react-native run-ios
So we completed the react native image zoom functionality in this tutorial which is “How to implement image zoom functionality in react native“.
You can find my post on medium as well click here please follow me on medium as well.
You can find my next post here.
If have any query/issue, please feel free to ask.
Happy Coding Guys.

Hi, I am a professional Ionic and React Native Pixel Perfect App Designer and Developer, with expertise in Client Communication, Bug Fixing, Third Party Lib, Version Control Tools, Requirement Understanding, and managing teams, I have 6+ years of experience in the same domain as well as in Codeigniter, JS, IoT, and more than 10 other languages. For the last 6+ years, not a single day went without design/development.
Please follow me on Medium: https://nehadwivedi1004.medium.com/