

How to start the first app in react native
This react-native tutorial is basically for freshers who want to start his career in react native, here we are going to learn how to start a react native app with detailed information, so let’s start describe “Getting Started with React Native App With Information for beginners”
Output image –
Introduction of react native –
- We didn’t use the DOM, we use the native component in react native.
- React native didn’t support the web view, we all know that ionic use the web view for run the ionic app.
- React Native uses RCTBridgeModule to make a connection between native code and JavaScript code.
- In React Native we uses the React to mobile app development.
So here we are going to learn basic of react native.
Nodejs
Nodejs is a JavaScript framework which is use to build your JavaScript code runtime.
Watchman
Watchman is a tool developed by Facebook for watching file changes.
For Mac users
If you want to run your app in iOS then please install and setup homebrew package and watchman.
Native SDKs– For mac developers
After successfully setup the homebrew and watch man, install Xcode which is free and use to develop iOS applications.
For android developers
If you want to run your app in android then please install and setup Android studio which is a free tool to develop Android apps, then setting up android studio developing environment.
React Native CLI
React Native CLI tool is used to start the project containing everything you need to build and run a react native app.
Create a project
So Letʼs start to creating a new project —
react-native init project_name(give a name which you want to give).Project Structure

Introducation of react native files or project structure.
App.js:
App.js is a entry of a react native native, this is a first file which called after app loading successfully.
node_modules:
- Here you find the all installed library of app.
index.js:
- Is the entry point to the app on a device/simulator.
iOS:
- It containing the Xcode project or pods file and all other required files for iOS development.
Android:
- Is the folder containing android related code to bootstrap this app for android devices.
Package.json:
- In this file we find the all third party dependency the of app.
AppRegistry:
- Firstly we talk about what is a AppRegistry, AppRegistry is the entry point to run a React Native application, app component or any other root component in the app should register by using AppRegistry.
- If you understand the AppRegistry properly then we start registerComponent such that the native system can load the bundle of the app and run the app by starting AppRegistry.runApplication.
- So now we start to discuss about the file that renders this App component is index.js in the root directory.
Components:
- Components are the elements that we see on the screen in app. there are lotʼs of prebuild components available in react native core, which is –
- Basic or Core components – View, Text, Image, ScrollView, TextInput , StyleSheet etc.
- List components – FlatList and SectionList.
- User Interface or Form Control components: Picker, slider, button, switch.
- iOS Specific Components: ActionSheetIOS, SegmentedControlIOS, AlertIOS, PushNotificationsIOS.
- Android Specific components: DatePickerAndroid, TimePickerAndroid, ViewPagerAndroid, ToastAndroid, PermissionsAndroid.
- Other important components: Alert, Animated, CameraRoll, Dimensions, Clipboard, StatusBar, Linking, Keyboard, ActivityIndic8tor, WebView, and Modal, etc.
These are some of the important files.
Running The Project:
- Starting a metro bundle is important for run the react native project, follow the bellow command.
npm start –
- This will start the metro bundler to watch for any file changes in app.js file in your project.
run app in android –
- For run the app in android we run the command – react-native run-android
run app in iOS –
- For run the app in iOS we run the command – react-native run-ios
After the project run successfully screen is.
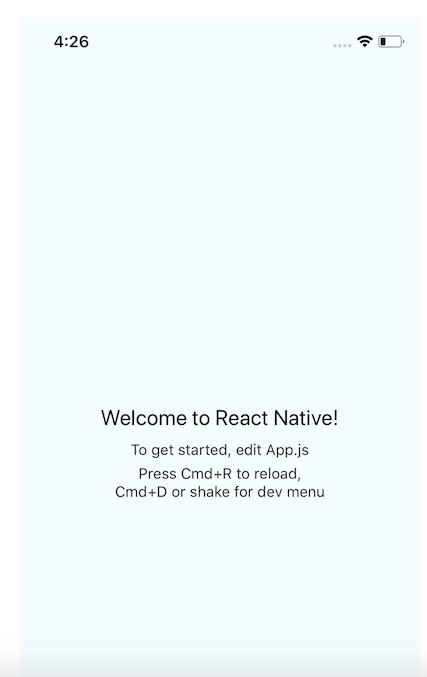
If everything going well then app run successfully on both platforms,
So letʼs start edits the app.js for see changes in app.
Modify App.js
 import {Platform, StyleSheet, Text, View} from 'react-native';
 import React, {Component} from 'react';
 const instructions = Platform.select({
  ios: 'Press Cmd+R to reload,\n' + 'Cmd+D or shake for dev menu',
  android:
  'Double tap R on your keyboard to reload,\n' +
  'Shake or press menu button for dev menu',
 });
 type Props = {};
 export default class App extends Component {
  render() {
  return (
    Welcome to React Native! // make  changes in these lines and reload the app  To get started, edit App.js  {instructions}
  );
  }
 }
 const styles = StyleSheet.create({
  container: {
  flex: 1,
  justifyContent: 'center',
  alignItems: 'center',
  backgroundColor: '#F5FCFF',
  },
  welcome: {
  fontSize: 20,
  textAlign: 'center',
  margin: 10,
  },
  instructions: {
  textAlign: 'center',
  color: '#333333',
  marginBottom: 5,
  },
 });
How to open console debug and hot reloading in app —
Hot Reloading:

- We use the Hot Reloading because it shows the app changes immediately after save the code in app.
- For enable your hot reloading you have to do is press Ctrl + M for android and Cmd + M in iOS, you can also enable this option by shake your device and select Enable Hot Reloading from the popup menu that appears.
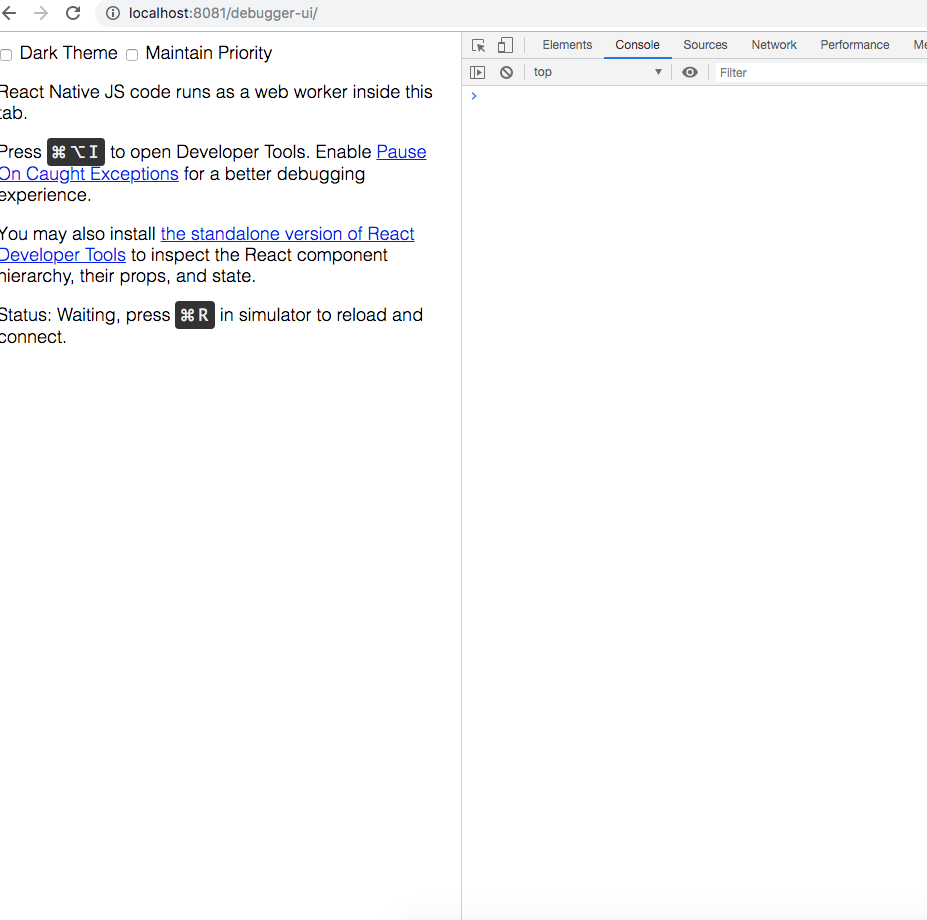
Open Console Debug:
- For open console firstly shake the device and then select the “Remote Js Debugging” option from list.
- Then the debugger is open in your chrome, where you find the console tab and all your console data is showing here.
Finally we completed the first lesson for beginners which is “Getting Started with React Native App With Information for beginners“.
Now if you want to learn the next lesson of this tutorial then please click here.
As well as you can find me on medium click here please follow me.
If you have any query please comment.
Happy Coding Guyz

Hi, I am a professional Ionic and React Native Pixel Perfect App Designer and Developer, with expertise in Client Communication, Bug Fixing, Third Party Lib, Version Control Tools, Requirement Understanding, and managing teams, I have 6+ years of experience in the same domain as well as in Codeigniter, JS, IoT, and more than 10 other languages. For the last 6+ years, not a single day went without design/development.
Please follow me on Medium: https://nehadwivedi1004.medium.com/

My name’s Eric and I just found your site itechinsiders.com.
It’s got a lot going for it.